

In this tutorial, learn how to fade out text while simultaneously changing its color in Premiere. This text effect is inspired by the Stranger Things title sequence shown in the video below.
In the title sequence, the text fades in red, and then turns white when revealed. It then fades out white and turns red just before it disappears.
1. Add bold text to your timeline. I used the following;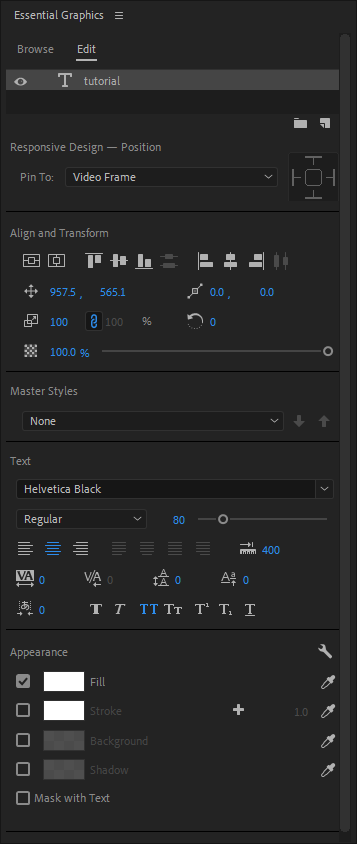
- Helvetica Black
- Size: 80
- All Caps
- Center Aligned
- Color: White
2. Make a copy of the text layer above the original. Hold “Alt” while moving clips to quickly duplicate them.
3. Apply a Cross Dissolve to both text layers and set the transition duration to 00:00:00:05. You can use the shortcut key “Ctrl + D / Cmd + D” to apply a default video transition to all selected clips. Then, hold “Shift” to select each transition and right-click > Set Transition Duration to apply the transition time to all at once.
4. Set the bottom text layer to color Red. Choose any color.
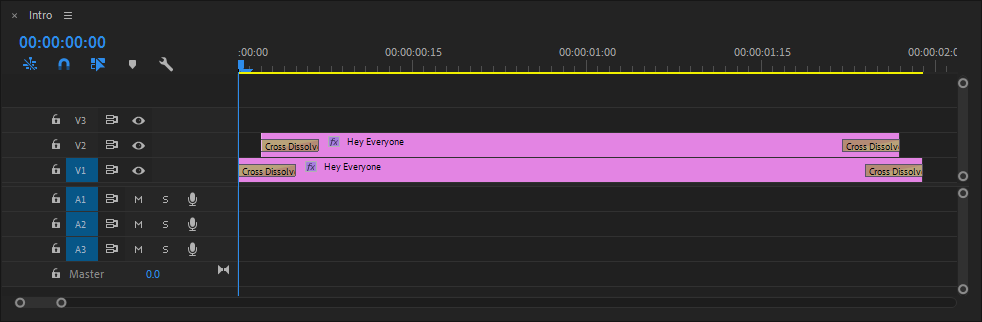
5. Offset the top, “white” text layer 2 frames at the beginning and end so that the red layer has a head start and final finish. When you play it through, you should see the red text appear briefly and then turn white at the beginning and turn red just before it completely fades out at the end.

Copy these text layers and repeat as necessary for your message.

Comments