

Today, we’re going to take a look at turning HD footage into Surveillance Footage using Sony Vegas Pro. With the help of a few FX, we should be able to pull it off quite easily.
Record your footage with the camera on a tripod. Typically, in a high corner somewhere you’d expect a surveillance camera to be. If your camera supports shooting in 4:3 that would look best. If not, you can convert it to 4:3 in Vegas or leave it at 16:9. Your preference.
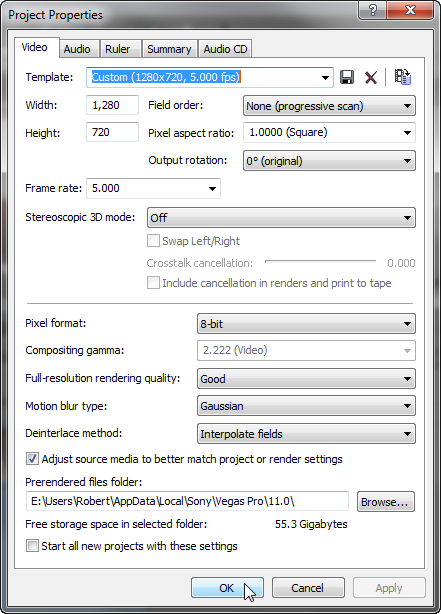
Import your footage into Sony Vegas and place it in the timeline. It is important to import this footage in a whole new Vegas project as we’ll need to adjust the project properties for this effect to work.
In the Project Properties, set everything as necessary. My footage was shot in 720p at 30FPS. Change the Frame Rate to 5 Frames Per Second. Usually, surveillance systems record in low frame rates such as 7fps all the way to 1fps. I think 5fps looks best for this but you can always adjust as needed. Also, be sure to set the correct Motion blur type and Deinterlace method. Click OK.
If you play your video clip now, you’ll notice the choppiness. This is exactly what we want.
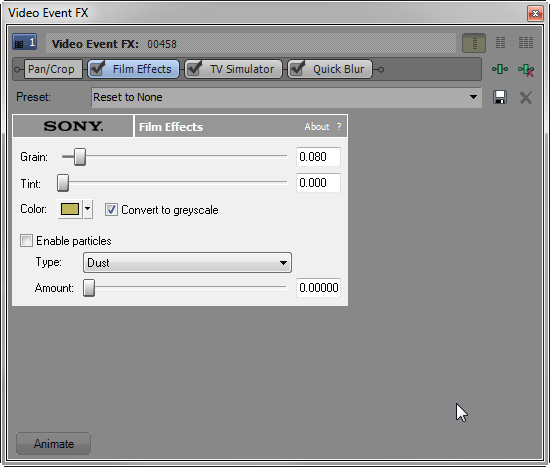
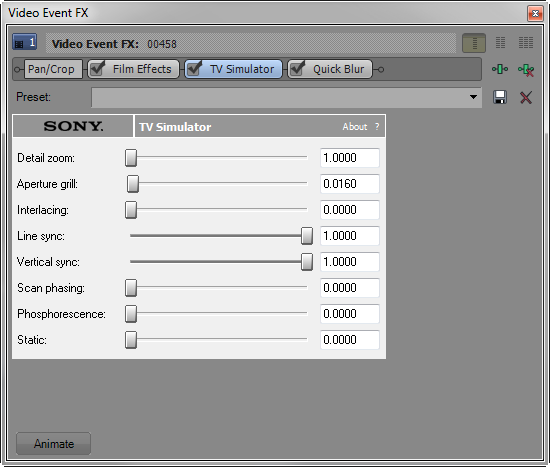
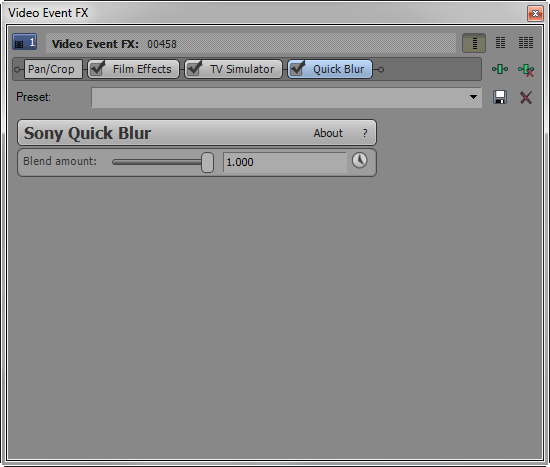
Now, lets add some event FX. Add Film Effects, TV Simiulator, and Quick Blur.
- For Film Effects, choose Reset to None as the preset. Bring the Grain up to around 0.080 and check the box to turn on Convert to greyscale. Un-check Enable particles to disable them.
- For TV Simulator, Reset to None as preset. Set Detail zoom: 4.0000 & Aperture grill: 0.0160.
- For Quick Blur, set Blend amount: 1.000.
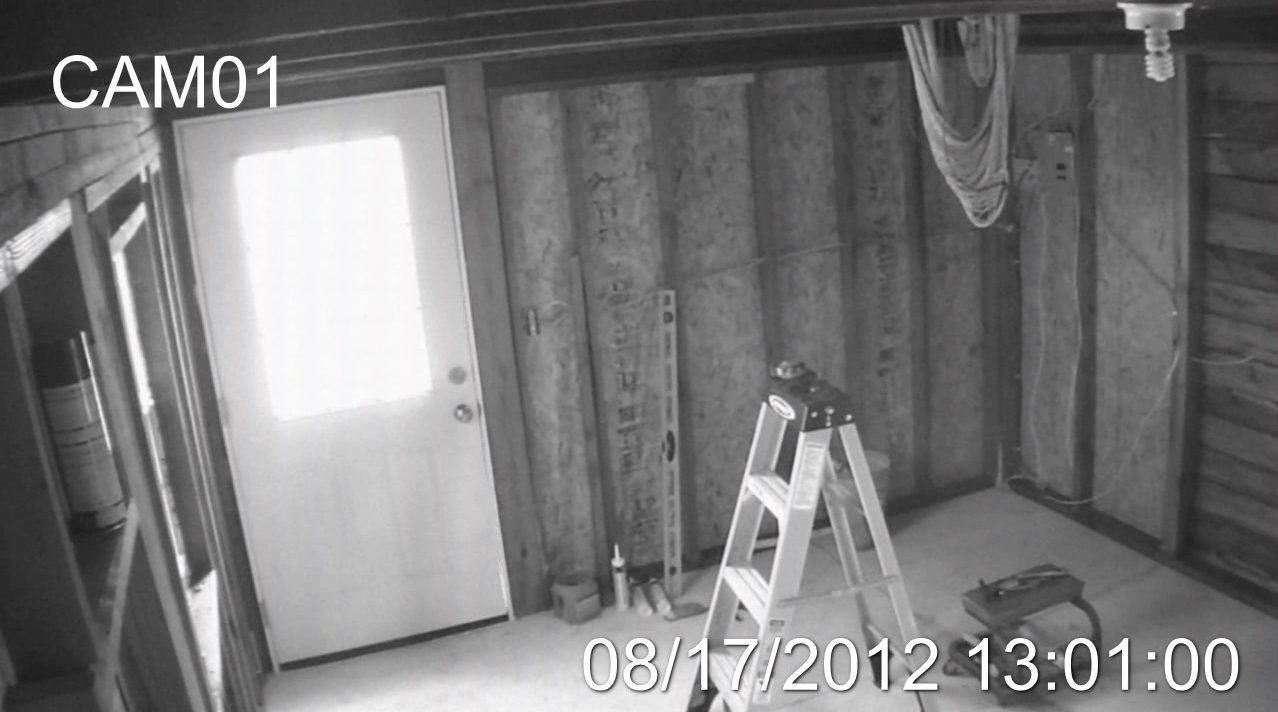
To enhance the effect you can add text overlay’s for the Camera Name/date/time.
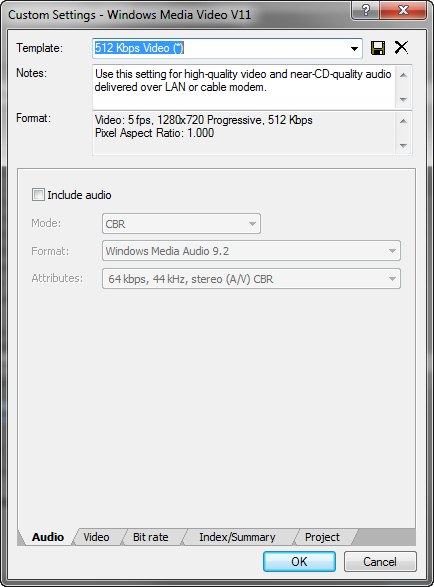
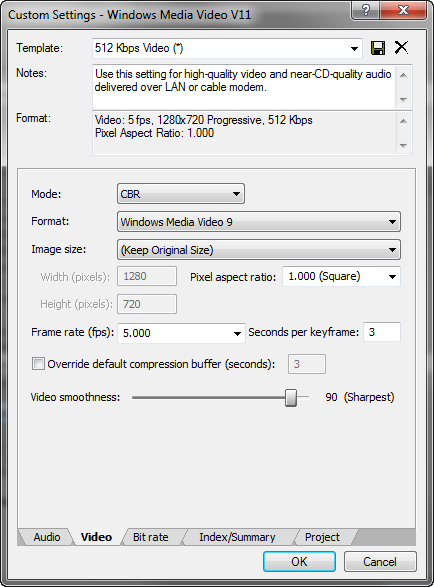
I recommend rendering it out if you’ll be using it in an existing project. I typically go with .wmv. You may have to unckeck Match project settings to display all Output Formats. Here you can choose any preset depending on the quality you’re looking for. I chose 512 Kbps Video with the following settings;

Audio:
This particular footage has no audio so I disabled the audio.
Video:
Image size: (Keep Original Size)
Frame rate: 5.000
Click OK and Render. Don’t forget to choose an Output location.

There you have it! Your footage should look pretty close to that of a surveillance camera.
Comments